Friday, 12 December 2014

My 'Not a New Years Resolution!' Resolution

Or when being organised isn't a creativity Killer.

I tend to flit from one project to another and back again, it is just how I am. but this can cause chaos when you are as disorganised as I have been.

It has gotten worse since getting onto Facebook and connecting with like minded people, and being inspired by their work, and being encouraged by them to be all that I can be.

So how can I do 'everything' and not go insane? I have tried a few times to be organised but there was something missing each time. Now I think I have hit on a way to be able to be organised and not kill creativity.

When spring finally hit this December I had all these projects I wanted to do, but got frustrated when I couldn't find the bits for the project. Or had to wait around for the base of my work to dry so I could start my 'real' project.

So I decided to get 'organised'. I wanted to put everything I would need for each project into bags. First I used the 'lunchbag' style storage bags with the ziplocks. But they kept sliding under other projects, cardboard as an insert helped, and you may find this a great way to start off putting things together at the beginning, but often they were not solid enough for the things that I had collected, or large enough.

I had some of the blanket bags you buy blankets in that have a zip, and these are fantastic for very large projects, but I didn't have many and some of the projects only needed small containers.

I went looking for the Scrapbook files but couldn't find any in the Variety stores and was ready to look for something else, until I went to the office supply store and there they were!

So now I am setting about getting things together.


This is some of the things I need for this 'Frog Wall-hanging' As I find the right colours in my hand dyed stash, I put it into here ready to use.


HAVING SUPPLIES ON HAND FOR THAT SPUR OF THE MOMENT PROJECT

Sometimes an idea hits, or you have a bit of time that you have squirreled away for yourself.  Nothing is more depressing than having to search for things, having to 'wait for something to 'dry' before you can go onto the 'fun' part, it kills the momentum and often your 'you' time runs out.

So here is a few tips that I have found handy before.

If you are doing a project with a long stretch of drying time, or you have a bit of time in between something else, not enough to start a project but enough time to do 'something' try this.  Especially if you have the gesso or whatever out at the time.


These are old dvd/cd holders that I am recycling into art folders. you can either keep the rings in or as with the black one I have removed the rings and will use scrapbook 'posts' and sew tabs onto the side of the project when completed.  These will then have a back put on where I can write what the piece is, how it was made and the supplies used. The folders themselves can also become works of art with a coat of gesso and your own personal touch of art. And can be zipped to keep your work safe.
 
I then made a heap of blank 'canvases' to work on as the inspiration hit me.

With these I cut a large amount of calico and interfacing (but you can do it the same as below if you want), and ironed them together. I have a top for the work and a bit of backing to firm up the material. This isn't necessary but it may be heavily embellished, or painted,  so I have done it this way as many of these will be used for sewing, painting etc.

 
With these I just got a few meters of calico and interfacing and ironed them together. I cut them out to a set size as these will all be starting pieces to new techniques and I wanted to keep them in the folders for protection. (You also don't have to cut them first, I just found it easier to do a few at a time). Then laying out a sheet of plastic on a table outside, I painted them with gesso. I could leave them to dry on the table and whenever I had a few minutes in between other things I would go out and paint a few more, or add another layer. Everything was there ready to just do it when I had a bit of time in between other things.
 
These are now ready to just grab when I need them. No waiting around for anything to dry so you can start. No more looking for things These are ready to go when the creativity muse hits you.
 
So being organized may not be such a bad thing after all. Even 'Her Majesty' approves, as much as she will approve of anything not involving her
 
I hope you have found this post useful, let me know how you go or message me for any additional information, and
 
Happy Creating


Thursday, 11 December 2014

Making your own stamps with bits and pieces around the house or cheap #1

I just got an excellent book by Lisa Walton, Creative Journeys, and she showed how to make stamps for your art work. Many people find it intimidating to carve, or just haven't got the grip they use to have. Others want intricate patterns, replicas of something and many other reasons why carving isn't always an option. Also finding money or the rubber for carving can also be hard.

Here are a few ideas to get you started on making your own stamps with your own designs. 

I go to the back of electrical appliance stores and they have sheets of white foam just being thrown out. Also large sheets of cardboard, either as boxes or the sheets protecting screens etc. I grab these, some pva glue and scissors and am ready to go.


This time of year in Australia, all the office supply stores are getting their 'Back to school supplies' ready. It is a great time to grab the extra large rubbers that seem to appear, and they are great for carving. these can be carved safely with carving tools, but my favourite is the Speedball Carver - which I tried to copy and paste a picture of but I am computer challenged and it didn't work.


This is a sticker that can be brought from a number of places. The reason it works so well is that it is one of those felt style stickers.  Great to put on a piece of foam. I didn't seal this one, as I wash it after every colour change. So far any old colours haven't come through.


This is just a set of wavy lines drawn onto the kids foam brought is small sheets. I cut along the lines spread them out and then added a scroll type flourish. Pva glued onto a piece of cardboard lying around, and onto the thick foam from packaging for a bit of grip.


These are the foam stickers you buy cheap at the store that the children play with. These ones have a sticky backing. Peel off the protection paper, stick onto leftover cardboard, Stick to packaging foam and seal with pva glue.


I tend to have a very ' give it a try' attitude, and I wanted to see what would happen if I ironed the thin foam sheets over metal embellishments. I used a protective baking sheet to cover the work. I tried laying the embellishment on top of the foam, laying the baking paper, folded a few times, over the embellishment and then layed and pressed the iron on it, and tried it the other way, both worked  The good thing about this is if the imprint doesn't come up enough, you just place it back in the grooves and repeat until the design shows.   I then cut around the crown and feather to get the outline. With the bicycle I stamped the design in the paint and then gently scraped off the excess paint with a old credit card to just get the bicycle.


This is one of those cardboard shapes used for scrapbooking, I wanted to use it but keep the shape for stamping. So again using children's foam sheets, I drew the shape and using thin small scissors cut it out, and kept both parts


In the children's section of many variety stores are the stickers that are nightlight stickers - or the 'glow in the dark stickers'. These can be stuck onto cardboard, and used as another type of stamp. If you find the paint etc slides off, either sand with glass sandpaper or use a fine grit gesso paint and paint over the entire pieces.  If you do this you need to make sure you let it dry well, and when you use it wipe it off straight away


This is a colouring in picture that I printed out, cut out the fence, rescanned and enlarged. I then printed it out cut around it and drew onto the children's foam.  Using this idea opens up a whole new world of possibilities.
 
As you can see there is no limit to your designs, if you are just willing to look at everything with new eyes. Hope you enjoyed this blog and I will try to update more often now that warm weather and getting outdoors and making a mess are possible again


Tuesday, 16 September 2014

Using washaway for your Art, Sculptures and much more

I use washaway for my free standing lace. That is it sews out the design and then you wash it and the 'material' dissolves in hot water leaving the design.

When I first got the washaway I wanted to make a cobweb overskirt.

(I thought I had lost the pictures but came across them while checking out some of my pictures downloaded onto my computer a few years ago.)

So here it is.

Using two layers of washaway for stability, draw your design.


Then using your sewing machine, sew with straight stitch. firstly up and down each line at least 2 or more times. I think I did about 3 or 4 to be safe.  then go around the outside lines doing the same.
 
Next change your stitch to zigzag and repeat. If you want it thin only do it 1 or 2 times, if thick do it as many times as you want.
 
 
This will be what it looks like when you have finished.
 
then hand washing it or soaking it in water (depending on what type of washaway you use, some dissolve in cold, some only dissolve in hot) and rinsing it a few times.
 
Lay it out flat to dry


And this is what you will end up with a beautiful spidery lace for your designs.
 
I did this for a doll, but it can be made bigger or smaller depending on what you want to use it for.
 
And the other ways to use washaway are "Only restricted by your imagination"


Printing on your own fabric

I wanted to experiment with just plain material and various texture mediums to see what would work. This was instead of having to buy them all the time.

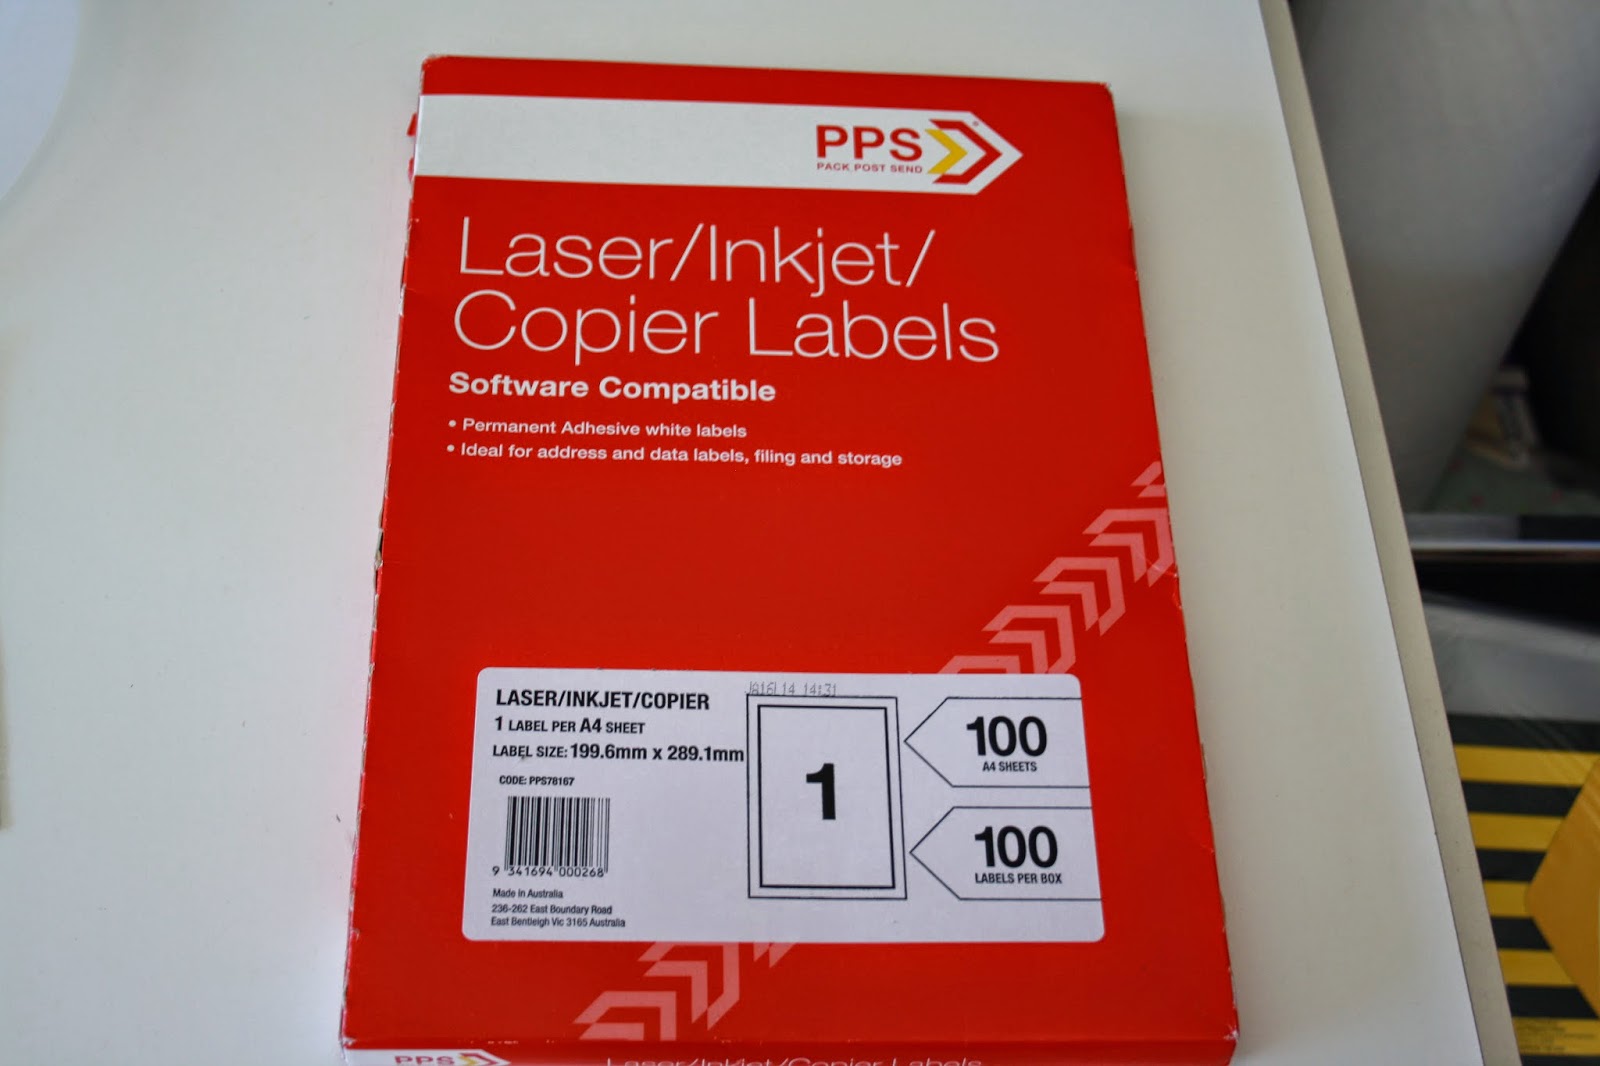
Firstly I brought these print labels

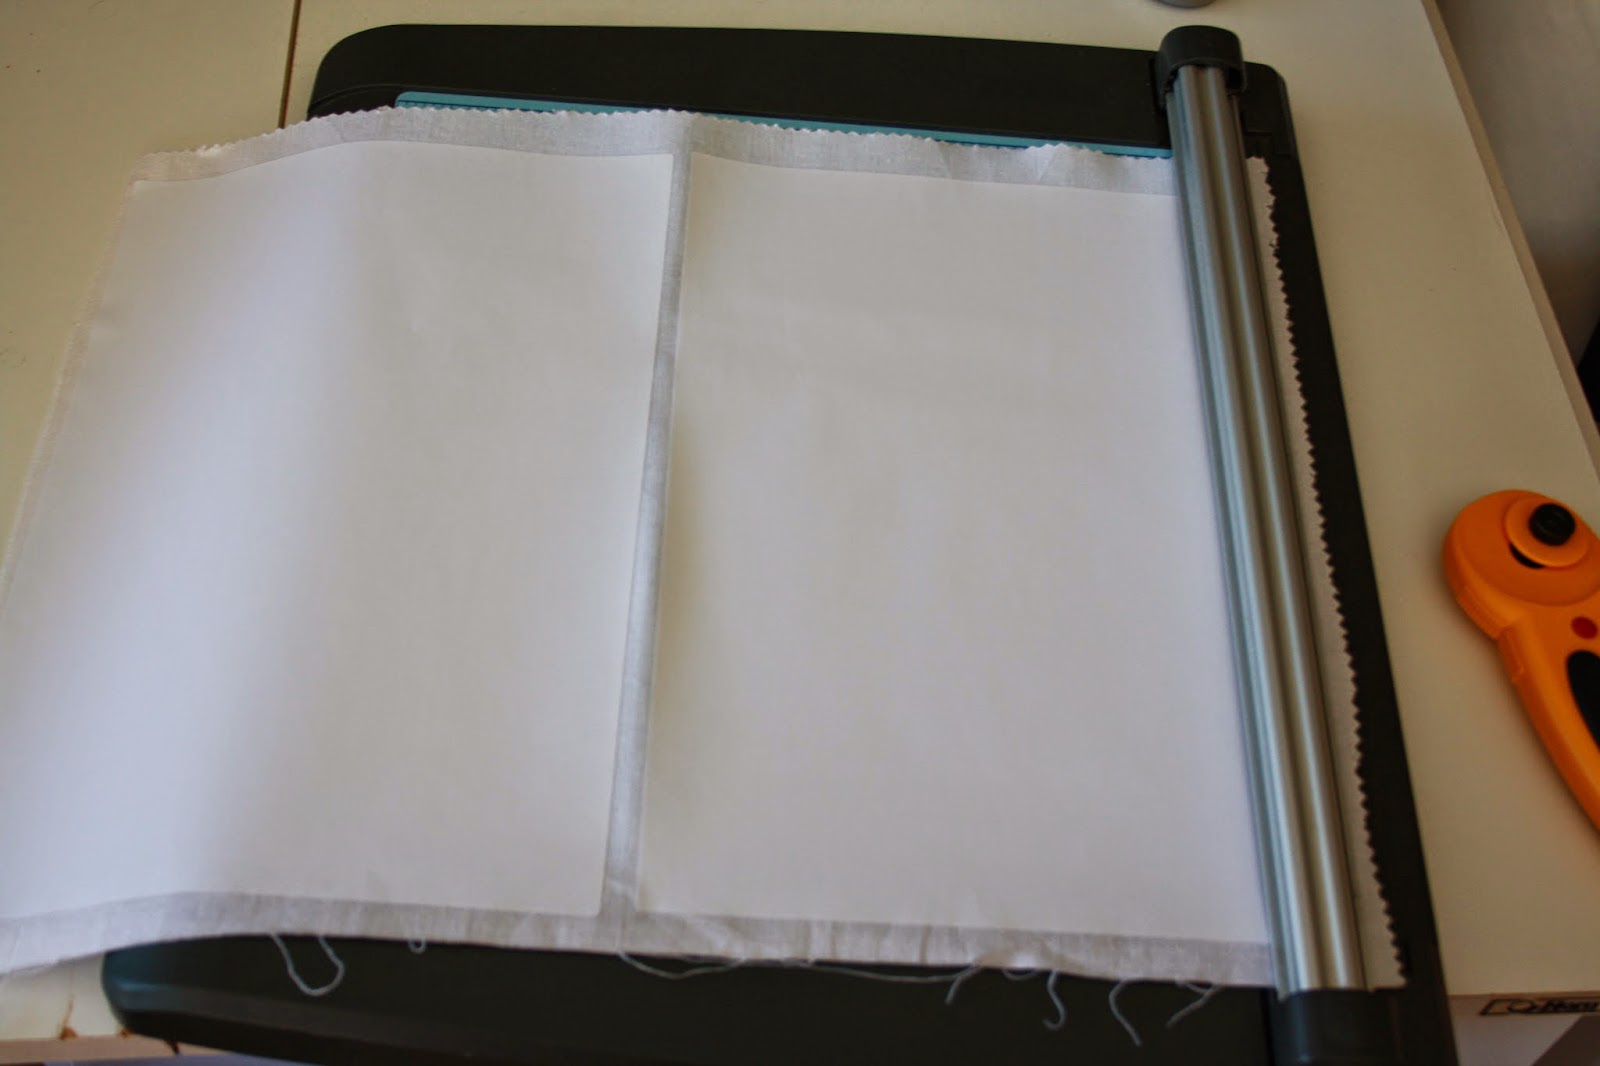
I washed and ironed plain white fabric, and then taking the front off the label and laying the sticky side up,  -or you can lay the material flat and press the sticky side onto it - carefully lay the fabric on top of the sticky and press firmly, running the side of your hand along the material to smooth out.


Then trim off the excess material with a sharp rotary cutter, I use the cutter as a guide and for safety.
Print out as you would normally. The sticky stops the material from lifting and jamming in the printer.

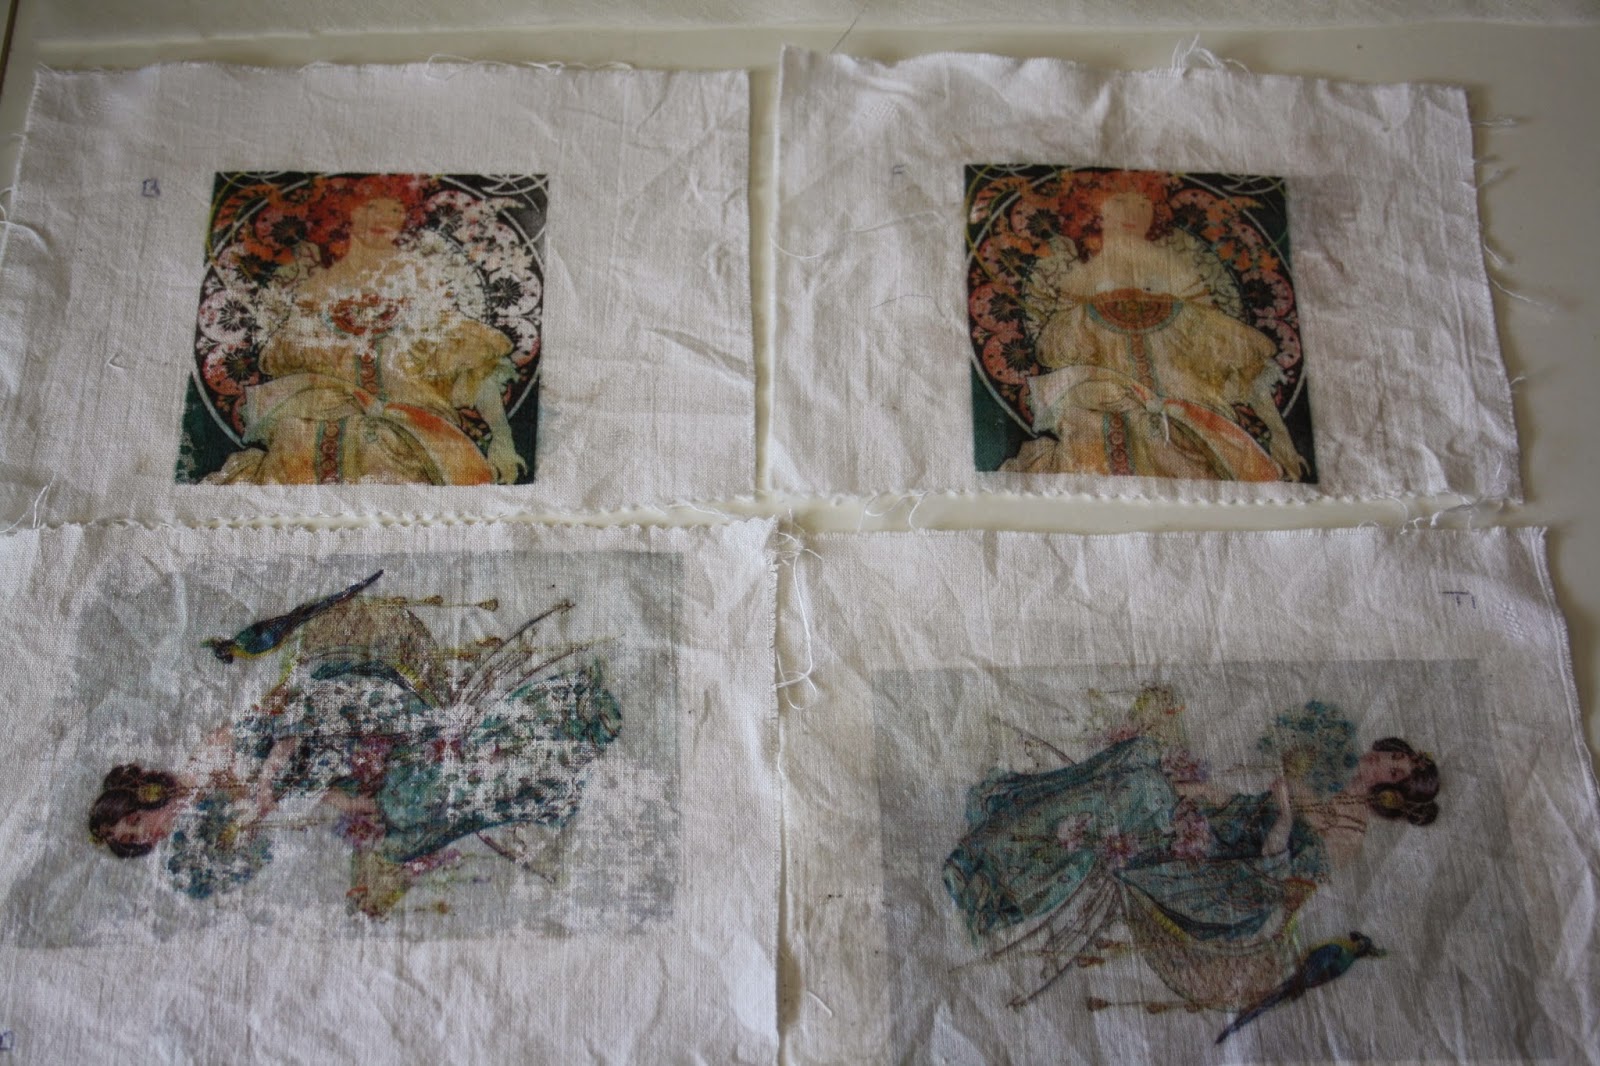
Take the backing off and as I was experimenting I marked F & B on mine and then separated them.


I then spread textile medium ( I had this on hand you can always try a different brand) on the front and back as marked and let dry. I left them for a few days. Hand washed them, let them dry and then then ironed between two pieces of printer paper. Wasn't too concerned about the outer material not smoothing out too much. Don't iron straight on the printed material or the iron will stick, I tried it on the corner so I would know if it would.
 
The result is very telling. The one with the medium on the back didn't preserve the print. BUT that may be because the material was thick and didn't come all the way through! the ones with the medium on the front kept the picture intact,
 
This was just the first try, and next time I will experiment with other coloured material, and will take my designs to somewhere I can print out laser prints and photocopy them onto the material as a laser print comes out deeper coloured.
 
Please feel free to continue with this yourself and let me know how you go and most of all have fun, I know I did 

Friday, 15 August 2014

Am I the only one? A confession of sorts

I have a bit of a confession to make, when it comes to new ideas, thinking outside the box and all that , I jump into it up to my neck and enjoy learning, experimenting, and generally having fun.

But when it comes to things that I see on Facebook,  and on blogs, I have a mental blank. I find I am intimidated and hesitate to try it. I know that I won't be good at it to start off with, that my pieces won't look as good, but still I hesitate to even get started.

Why is that? I know we can't live up to others standards. That we must all earn our experience. But what makes us afraid to try.

So as I ponder this, I wonder what else could we achieve if we were able to break down this barrier.


Saturday, 9 August 2014

Iron Lace

 
On my Facebook page I have been posting pictures of my progress with Iron Lace, I was asked today what it was and what I'm going to do with it. This actually ties in with what I was thinking about while I put the next coat on it this morning. This morning a lady on Facebook asked if she should do formal study or study at home herself.  This is something I have been struggling with the last three years or so after making a promise to myself (see previous posts).

There is part of me that wants to go and study art etc. but there are other parts that strongly object to this plan.  Firstly my back and hip often make it hard for me to get around, and sitting studying would be very painful. Secondly I have never fit well into the education system. I don't just want to know something, I want to know and understand why something is as it is, why it is done this way and why if I can see another way of doing something it is wrong.

But that is for another blog or five.


I am doing Iron Lace because I thought of it quite awhile ago. I also like the iron on old houses, grates etc and I wanted to see id I could duplicate it. I never throw anything out if I can visualise using it another way. And I had a picture in my mind of sticking these 2nd laces to an artist board and painting them.

I also thought of sewing them by hand to an artist frame and I will probably try that later.

This time I wanted to do them in iron type colours, and because I couldn't decide which paint would go on first, I decided to do a series and explore different colours and how they work together.

I have not worked with the Derwent Paints before, so was unsure of the coverage, how the colours would stand out etc. I painted the stuck down lace with gesso, and then did the darker red oxide first.

Now at the time I thought about not painting the laces themselves with this colour, but I wanted to see how the lighter Australian Sienna would show up on it, and that's when I came up with the idea of doing a series.
I wanted to know how and why and the only way to find out was to try.

That is the way I am. I want to try it myself so that I can visually see why something doesn't work, not just be told 'you don't do it that way'  Having not used these paints before I wanted to experiment with them. Try out how they work over different colours etc.

And so I have learnt that this colour doesn't stand out as much as I want over the red oxide as I wanted.  So maybe later on I will try a lighter colour.

As for what I am going to do with them? I'm not sure. Keep them as displays of what my laces can be used for I think.

I plan on doing more in pinks, blues etc. Lighter colours for wall hangings etc.

But for now I am just focusing on the darker iron colours, and having fun


Monday, 4 August 2014

The importance of play dates with yourself

I remember reading a long time ago about the importance of having play dates with yourself.  I wish I could remember where I read it,  but I'm sure that I have read it in a few books, blogs and websites.

So as part of my promise to myself I have decided to have at least one a week.

But there are rules;
1. It must not be for the business.
2. It has to be something new, or something I haven't tried for awhile that didn't work the       first time,  and I had wanted to try again.
3. It must be messy!

The messy bit is about having fun playing with my inner child. To make messes and known that that is ok.
To let go for awhile the rules of what does and doesn't work. Just give it a try for the hell of it, and if it doesn't work, it doesn't matter.  I had fun.

 If it does then great I have created something that I imagined,  pictured and brought to life.
I have honored my creative self while letting my inner child have the joy of doing something just for fun.


Today we had a sunny winters day, and I planned on making the most of it. I have wanted to stick my 'seconds' laces onto a artist board. Let them dry, gesso over it and then paint in a copper or bronze,  then put a contrasting colour as a rub on.

So today I did the really messy bit, glued it down (had glue all over my hands, am still picking the bits off) and now just have to wait for it to dry.

So today I had my play date, made a mess, sat in the sun and I loved it! Wonder what my next play date will be?


Saturday, 2 August 2014

Using disperse dyes- or thinking out of the box


I am hoping I can get my pictures off my Facebook page onto here but if not that is where you will find them. Until I get a chance to transfer them the other way


I brought disperse dyes at the Perth Craft show earlier this year.  I wanted to be able to dye polyester based fabric,  and procion dyes won't dye them. I didn't know much about them but was told all information was available on the website.  When I first read about the time it took to boil them etc my first thoughts were very rude to say the least. I thought about setting up a gas stove outside under the carport, seeing we are in winter, and finally getting some rain. But I didn't want to spend hours boiling these dyes. They would be restricted to one colour, and to make any profit, I would have to sell them at a high price, as I often come across the attitude that home made or hand made isn't as good as store brought, isn't as good etc, and should be cheap.

This doesn't take into account any of the hours spent on making it. But that's another post!

But I wasn't thrilled with the idea.  So as usual I decided to do it my way. Already doing my own dyeing with the procion dyes, I decided to try using this dye the same way, as what I wanted was multi coloured fabrics, and boiling wasn't going to achieve this.

So I wet my material in water, wrung it out as much as possible,  and then scrunching it up, placed it in an pasta microwave dish, one specifically used only for this type of thing. Using a squirt bottle I squirted colours over the top randomly.

It didn't look much, but disperse dyes work on heat, so I wasn't too worried.


Now this is the good part, unlike procion dyes that need to sit to obtain depth of colour, disperse dyes just need heat so it seems. So I took them out to my outdoor,  non cooking of food microwave. (Please don't do this inside,  or use your food microwave,  this is very important!  I have a microwave specifically kept for my dyeing and craft. And there are fumes so take precautions). And I was able to microwave them then and there. I so love this!

To start off with I microwaved in 5 min bursts to see how the fabric reacted, then as it was ok I did it in 10 minute bursts, and the fabric was still ok.

I then let it cool,  and drained it. My research showed that once dyes are used and heated they become non toxic, so are safe to dispose of, and as I was only using a small amount I felt it was ok to drain down the sink . Then I just put it into the washing machine and hung out to dry.

As I only had a small amount of dye powder I couldn't experiment more, but the results were very satisfying.

When I get more dye I will be using a filter system I set up for other liquids.

I have a large/tall bucket with holes in the bottom. I cut out a round piece of flywire and place in the bottom. Then a deep layer of sand, another layer of cat litter, also deep and then shredded paper or scrunched up newspapers,  I then tip any liquid waste into this.

This filters out as much scraps,  rubbish etc as possible.  The paper/newspaper is put into the rubbish and replaced. I replace cat litter and sand when needed, more often if I am doing a lot of dyeing.

I was very happy with the results and this meant I could now dye material made with polyester.  And as most of the silky, satin etc types of material are made from this these days, I will be able to sell this type of material now at a reasonable cost. and best of all I have many satin type fabrics to use in my own work, which was the point after all.

I also tried them using spritz bottles. I wet the material took it outside and placed it on a tray. I put peaks and folds, scrunched and generally made it look like my bed in the morning. I then spritzed it with the red/pink colour and the blue as I wanted shades of purple in it also.  Don't panic if you cant see much colour, again its that type of dye. I then placed them into the microwave dish and heated/cooked them for 5 min.

The results were just glorious. Marbled fabric!

WARNING. Not all polyester material will work like this. There are some which seem to have a plastic type cotton and will melt. Try all materials first in small amounts or in just a few minutes at a time, and let cool in between.

Ps, I also do my procion dyes the same way.
Except I use icecream containers, rubbish bags in the containers, and leave them for a few days, depending on how busy I am. I heat set them by microwaving them for 10, or 15 minutes,  depending on the amount of material in each batch.

At all times I am careful about the powders when transferring them into the containers for mixing. please do this in an area that has no breeze or on a windless day. In winter I do it in my kitchen with the fan extractor going.

First and second picture is the spritzing. The multi coloured is the batching in the containers. The third one is a large piece done (table seats 10) which is for sale.


Friday, 1 August 2014

I'm spinning around, move out of my way........

This is a draft that I forgot to post at the time


I posted yesterday on facebook that I had not kept a promise made to myself 3 years ago, to honour my creative self.

I have been feeling discontent, frustrated by small things, dreading each morning, and longing for bed at night just to escape.  On the weekend I had a grung Sunday. For our family it means, help yourself to food, lazy around in grungies, etc.  On these days I set myself up with paper, pens, computer, books, magazines etc and I dream. I write notes, plan out ideas.  Or I read all day and just be. 

Last Sunday I found old notes, went through my fav websites, scrolled Facebook and came to the unhappy conclusion that I was slowly dying of supressed creativity.

I had infact let myself get swallowed up somehow by trying to live up to others expectations for my business.  It was never meant to be anything but a small home business.  I brought the embroidery machines to make my own Free Standing Lace for my own quilts and textile arts etc.  I thought about selling it to get a bit of money to help pay for supplies. I started hand dyeing also for my own Art Quilts, because I couldn't get what I wanted.

 I had promised myself that now I was unable to work as I had, I now had the opportunity to follow the 'Path not taken'.

Since posting that message I have felt such a feeling of happiness and freedom I haven't felt in a very long time. My mind has freed itself and I am constrantly grabbing pen and paper as I write down ideas, plan and draw designs.

I can look at my stash and know I don't have to 'wait' until I have the time.

So now I will make a poster or wall hanging with this promise on it.

I will no longer turn my back on my creative self.
I will bring to my life the joy of expressing all that is within me.
I will give my imagination the freedom to fly, and I will set my Creative Spirit free.
Each and every day I will shine a light on what I hold inside, and know that I bring to light my passion,  joys and sorrows.
They need no longer be hidden, and I need no longer hide who I am truly meant to be


Tuesday, 29 July 2014

Learning patience, and computer skills

I have been having a few days off, after posting on Facebook how dissatisfied I have been feeling and coming to the realization that I had broken a promise to myself that I would no longer push aside, ignore, and downplay, my creative ideas or my creative self.  Since then my mind has just been in overload as I finally let ideas and images have a free reign.  I have a notebook with tear out pages so that I can draw, make notes and try to record those things that have been pushed aside for so long. These then get written up properly in a large art journal with other notes about the idea.

The one thing I knew for sure was that I had to learn how to put pictures on my blog, or everyone would get sick of my posting so many times a day on Facebook.  This way I can just mention an idea and direct them here if they are interested.

So after my son showed me how to transfer photos from my tablet, which is how I take most of them these days, onto my computer, I took the time to calmly - and without swearing at myself or the computer - investigate the blog page that you post on.

And  low and behold, it worked! No swearing, no threatening the computer with the chance to learn to fly, nothing.  Maybe there is hope for peace between my computer and I at last (but I am not holding my breath! )

Saturday, 26 July 2014

Downsizing, how much 'stuff' do we really need?

We have been told we have to move again in March next year. On my last move I swore I was downsizing. Yea right!

Well this time I have heaps of notice and I'm not sure where I'm headed. I have been toying with the idea of moving out of Perth, but stay in WA. I have also been toying with the idea of packing myself up into my car, buy a trailer and travel around.  But in either case I still want to drastically downsize. So how much 'stuff' do we really need, and what can we live without.

So I have decided to do the 'if I travel, what do I really want to take with me'.  Well that downsizes my wardrobe to almost nothing! Books? I have been slowly buying and exchanging my paperbacks etc to downloads, and also my magazine subscriptions. I will need to go through my craft things and only keep things that can't easily be replaced, Make a storage box, lined with sponge/foam etc for my sewing machine. Only keep one embroidery machine so I can make my own laces, for my quilts etc, also boxed. Furniture etc would go into storage, I may decide to get a place if it is too much. And there are some items to precious to let go, memories treasured that cannot be replaced.

I'm not planning for a caravan because then you can fill it with 'stuff', and believe me you would be surprised just how much stuff you can stash in a caravan, I know! And the object is to par down to what is essential to my physical and mental wellbeing.

So how 'stuff' do we really need?

Is it just comfort, extravagance, want - not need?  Well I am about to find out, and it is going to be hard, because I am one of those people who hoard.  I was brought up by grandparents who went through the depression, who never threw anything away, upcycled everything, and used something until there was no possible use for it.

I have to unlearn, let go, and not shake when getting rid of something. Close my eyes at clean-ups, drive past roadside drops and just, keep reminding myself that I cannot possibly take this on the car or trailer.

Wish me luck, I'm going to need it

Thursday, 24 July 2014

Ba humbug!

Ok I've done Christmas in July. It was over 20 years ago, in the Snowy Mountains.  Australia doesn't have snow at Christmas and that was a wonderful theme for our long weekend ski trip.  Was great fun, small presents, lots of laughs.
But now somehow it seems to have been taken over by the retail trade.  Not only do we have Christmas shoved down our throats from around October onwards. Now we have it shoved down our throats in July and earlier.

I am not anti Christmas, even if I am not of that religious persuasion. I did the whole Christmas thing when my Children were young. gifts, decorations, tree. The whole works, and I loved to see their faces when they saw under the tree and opening their presents.  Now my children are young adults we still do the tree, the presents and when not at their dads we spend time enjoying each others company.

But now we have this whole commercial Christmas package not only pressuring us at Christmas time but in July also.  Lets go back to the way it was, just a non commercial fun excuse to enjoy being together, and sharing.

The difference between WIP's and UFO's

When I talk about wips and ufos people get confused as to what I mean.

Here is my working definition.

Wips, things I am working on, at various stages, that I pick up, do a bit and put down.  These are projects that may take awhile to finish but at least I have the satisfaction of getting something done.

Often we have small amounts of time that we waste because we think that we don't have enough time to do ........   But if we have things set up, lying around with supplies attached or accessible, we can often do bits and all these bits add up to a finished project.

I have these all over the house. Lounge room, sewing room, dining room.  I have them in ziplock storage bags or whatever they will fit in, with all the bits I have rehearsed on them and decided to use.  Sometimes I find something that may go with a project but not have the time to rehearse it, so I put it in the bag with the project and then when I do have time its there to try.

I have things I can carry with me already bagged that I can do if I am going to be sitting somewhere waiting for awhile.

All these things are my wips.

Ufo's are things I am frustrated with, waiting for inspiration, waiting to purchase something for - that I usually cannot find.  Or just something that is not working out the way I picture it and I have to walk away and give it time, before I go back and look at it again. I wrote about this process in one of my others posts 'Most people I know think that I'm crazy'. I have to walk away and give myself time to rethink, re-visualise.

Or they got forgotten, misplaced under piles of other things etc

These are my ufo's.


Wednesday, 23 July 2014

Most people I know think that I'm crazy - and that's ok

I have had the song lyrics "Most people I know think that I'm crazy" running through my head since I woke up this morning.

Well that isn't anything unusual, most of the people I know probable agree with this, and love me anyway.

But this is why those particular lyrics are running through my head at this moment.

I was talking to a friend I haven't seen in years, and catching up on life, children, what we are doing now, etc and she asked why I have so many works in progress (wips), and ufo's.

I tried to explain over the phone, and I am sure had she been here she would have done the 'back away form the crazy lady' routine. As it was she stated that this was an 'unusual (read crazy) way to work. So I thought I's put it into words and see if it made any more sense. It does to me. Does anyone else work like this or am I really crazy?!?

Firstly, because of back and neck injuries, as well as osteoarthritis, I find it hard to sit for too long, or be in one position for too long.  So I have projects that I can do bits on when the hands and back aren't in too much pain, so I can progress bit by bit.

(Also sitting for too long drives me nuts!)

Next I have a mind that will not focus on anything else if I have an idea floating around in my head.  I am unable to focus on one thing if I have another idea in there. I've tried writing it down, and this sometimes works.  What is better, is if I make a start, put things together, buy the bits for it etc, then I can say to my mind, "I will focus on this, (whatever I am doing), at this moment because I have made a start on the other idea, and I will move onto it later"  Then I don't get frustrated that I am not working on my next idea, because I have at least made a start. I did say I was unique (weird).

Another reason is that I have a certain picture in my mind on how 'it' will look.  If it is not working out, and I am getting frustrated, I walk away from it. I go back occasionally to see if I like how it is turning out now, or if I have an idea how to change it to the way I pictured it.
Often I will get an idea flash into my head of what to do and I will go back and try that. Sometimes I accept that no matter how I try it is not going to work out the way I want.  If I can accept that I will move on with the project. If not, I let it go, learning from my mistakes.

Or I will put something aside until I find the 'something' that just says 'Yes', that's what I needed. Sometimes it is just a case of learning something new that will make the project work.

And lastly - I think - when I see something new or read about a new technique, I just have to try it out asap.

Sometimes as creative people we have ideas that are ahead of their time, and just waiting for something to be invented.  Sometimes we can invent them ourselves, and other times we wait for those a bit further along the creative road to invent them for us. I do love these people so much. They do the inventing, and I get to play!

This works for me, and if it takes awhile to finish, unless there is a deadline, so be it.

So am I really that crazy?
Actually I think that I am, and you know what, I love it!

Tuesday, 22 July 2014

Being the 'Weird Kid'

Ok. So there are going to be a few posts each day until I get out of my head what has been meandering around it.

Another picture on Facebook about being your unique self. When I was at school and growing up it was called being weird.

I could look at things and see shapes and pictures others could not. I had an incredible imagination and was a favourite among parents as I would tell the smaller children stories about fairies,witches, make believe that I made up on the spot to keep them amused.  The school bus driver loved me, because I would keep all the younger kids quiet as I told them my latest story.

I was more comfortable in my holey shoes and pants, than I was in getting dressed up to go to school, and I insisted on wearing trousers under my dress, so that I could spin around the monkey bars, and beat the boys many times. I was probably the only 'tomboy' in my age group all the way through school and was always on the outside.  I hated dresses, and as long as my hair was tied up I didn't care what it looked like.

But the hardest part was the fact that I was so different.

I talked about how there were not enough trees on the farm, and got patted on the head by all the (male) farmers. I spoke about the need for green belts, undisturbed land, crop rotation.  I didn't know how I knew these things, but I knew it was important. Now I would be called an environmentalist, not a know it all little brat.

I made things out of bits and pieces and loved bringing things home from the tip and making things out of them. Now it is shabby chic, and upcycling, not being a scab.

I would walk in the bush and feel the land around me, lay on the ground and feel the earth beneath me and feel the breeze wrap its arms around me.  Now I would probably still be called weird but I still feel these things, and know that I am one with nature.

I hate shoes, noisy parties, and I don't drink or smoke. My grandparents, who I grew up with were chain-smoking alcoholics who grew up in the war and depression. Most of my life was spent on a farm, and I only saw other kids at school. This meant I grew up fast, so I never could see what the other kids carried on about, and honestly I thought they were weird to.

Now I keep to myself, have a small group of friends who accept me for the unique person I am,
still don't go out to parties, and the only places I am happy shopping is in craft, material, art and hardware stores.

And you know I don't really mind being called weird now.


Ok, so this is me.

I thought I should start a blog because sometimes I do tend to go off on a tangent, hence the name of my blog.

Here I will go into detail about my artistic experiments - whether they work or not, get feedback from others interested in the same things, and also thoughts that tend to meander through my head, from things I observe, see on Facebook, or hear. This is not a comment on such things so much as my thoughts and memories, often brought up by what is around me.

Like a few days ago I saw on Facebook a picture about children in the outdoors, or lack thereof. it reminded me of being a child, white frosty morning, holes in my shoes, pants etc, and getting a sheet of tin, running to the hill next to our house (well caravan attached to shearing quarters, on a farm actually), and running to the top with all the dogs, and sliding down. Dogs all running along beside me.  Then hauling the tin back up again, over and over and loving every minute.   No worries about soaking wet shoes and clothes. No worries about cutting myself on the tin. Tumbles were exciting and my playmates had four feet not two. And I was so happy, and never thought about how cold I was.

But I was not encouraged to make messes in the house, my creative attempts were laughed at and put down.  And drawing and scribbles were not considered to be a career choice, or a life style choice.

I hid my writing, stopped creating what was not acceptable, and grew up.

I have two children and I let them dig in the back yard, draw with chalk all over the paths and walls, took them out to jump in puddles, climb trees, and run in the house and outside with no shoes.

I hugged them often, held them when they cried, and laughed when they were filthy dirty from being creative outside. My son is 20 and hugs and kisses me each day, and my daughter is 18 in September, and she still comes to me to be held when it just gets too much. Each day we tell each other and show each other how much we love each other.

We always had messes in the house even in summer.  the place was full of empty boxes waiting to be constructed. Paper laying everywhere with drawings on them and I always found money for new pencils, string, tape, chalk, etc.   They were never bored because they were too busy creating.

And now I have two children who are talented and artistic. My son with computers and graphics, my daughter with drawing and graphics.

Now it is my time to reclaim that which was hidden for so many years. It will be a long hard road as I learn to be that creative child of so many years ago. As I learn not to be ashamed of the mistakes I make, the writings that need to be rewritten, and that there is no such thing as a mistake, only the way not to do it next time.